
Views: 0 Author: Site Editor Publish Time: 2025-04-18 Origin: Site
LED Neon Flex is revolutionizing lighting. This energy-efficient, durable solution is quickly replacing traditional neon lights. With its flexible silicone design, it's perfect for signs, home décor, and architectural features.
In this article, you'll learn how to install neon flex strip light easily and safely. We'll guide you through the steps, tools needed, and tips for a seamless installation.
Before you begin installing your neon flex strip light, make sure you have all the necessary tools and materials ready. Here's a list of what you'll need:
The neon flex strip light tube is the most important component. It comes in various lengths, colors, and styles. Choose the right one based on your project needs. Whether you want a bold look or something subtle, pick the style that fits the space.
Your neon flex strip light will require either a 12V or 24V power supply. The choice depends on the length of the strip and how much power is needed. Always check the specifications of your LED Neon Flex before selecting a power supply. A 24V supply is generally more efficient for longer runs.
For proper installation, you'll need:
End Caps: Seal the ends of the neon flex strip light to protect the wiring and ensure it's water-tight.
Power Caps: These are essential for connecting the power source securely to the strip.
Heat Shrink Tubing: Helps protect the connections, especially for outdoor use.
You won't need anything fancy—just the basics:
Scissors: To cut the neon flex strip light to the required size.
Wire Strippers: To strip the wires cleanly without damaging them.
Drill and Screws: For mounting clips onto the surface.
Screwdriver: To secure connectors and other parts.
Mounting Clips: These hold the neon flex strip light in place.
Adhesive: For a simpler installation on smooth surfaces.
If you're installing neon flex strip light outdoors, consider the following to protect it:
Silicone Sealant: Seals the connections and keeps moisture out.
Waterproof Connectors: Essential for ensuring safe, reliable connections.
Heat Shrink Tubing: Provides an extra layer of protection from the elements.
Having all these tools and materials on hand will make the installation process smoother and quicker. Make sure to double-check your equipment to avoid any issues while installing.
Start by measuring the space where you want to install your neon flex strip light. Planning the layout is essential to avoid cutting too much or too little of the tube. Be sure to account for all curves or angles in your design.
Next, clean the surface where you'll be mounting the LED Neon Flex. The surface must be flat, dry, and free of dust or debris. A clean surface ensures strong adhesion and helps the mounting clips or adhesive stick properly, preventing the light from coming loose over time.
LED Neon Flex tubes typically come with marked cut points, so you don't need to guess where to make cuts. These points are spaced at regular intervals to ensure proper electrical connection and safety.
Use sharp scissors or a utility knife to make clean cuts along the marked lines. It's important to avoid damaging the internal wiring during this process. When cutting, make sure the cut is straight to avoid any uneven or jagged edges. This will also help in achieving a clean and professional look when you install the lights.
After cutting, you will see exposed wires inside the tube. To connect power, attach the power pin securely to the exposed wires at the cut end. Make sure the power pin is pushed in all the way to ensure a firm connection.
Next, connect the female end of the power cord to the power pin. Be sure the connection is tight and sealed to avoid any power loss or short-circuiting. Afterward, install the end cap on the opposite side of the tube. The end cap will seal the other side and protect the exposed wires, completing the power connection.
Now it's time to mount the neon flex strip light to your chosen surface. You can either use mounting clips or adhesive, depending on your installation needs. Mounting clips provide additional support and keep the light in place, while adhesive offers a more streamlined look with fewer visible components.
When mounting, make sure the LED Neon Flex follows smooth curves. Avoid sharp bends, as they can damage the light and affect the glow. If you're installing it on a curved surface or around corners, plan your cuts so that the bends are gradual and smooth. For outdoor installations, ensure that the power supply is located in a dry, safe area away from direct contact with water.
If you're using LED Neon Flex for outdoor installations, you must waterproof the connections. Apply a generous amount of silicone sealant around any exposed connection points to prevent moisture from getting in. This step is crucial for ensuring the longevity of the lights when exposed to the elements.
Use heat shrink tubing to cover the power connections. This will offer extra protection against the weather and prevent any water from reaching the electrical components. Make sure the tubing is tightly sealed and that no gaps are left where water could seep in.
For even more protection, use weatherproof connectors designed for outdoor use. These connectors are specially made to resist moisture and keep the electrical connections safe in damp environments.
When installing LED Neon Flex, following these best practices will ensure a smooth process and longer-lasting results.
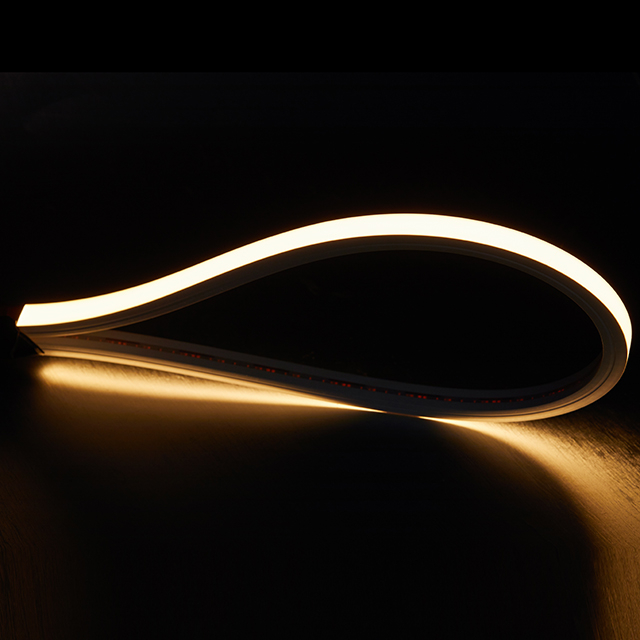
Twisting the neon flex strip light can cause it to distort, affecting the light quality and potentially damaging the internal components. Always keep the strip straight or follow smooth, gradual curves. Sharp bends can also weaken the material, so try to create rounded shapes instead.
Make sure your power supply matches the required voltage—either 12V or 24V—based on the length and type of neon flex strip light you're using. Check the manufacturer's specifications to confirm your power supply is compatible. Always ensure all connections are secure to avoid any electrical issues.
To keep your LED Neon Flex strip secure, use mounting clips or adhesive tape. This helps prevent sagging or sections coming loose over time. For best results, install the clips every few inches to ensure even support along the entire length of the strip. Proper installation keeps the strip in place, maintaining its shape and preventing damage from tension.
Installing neon flex strip light brings efficiency and versatility to any space. With the right preparation, it's a straightforward process. As a leading manufacturer, Orient Lighting Co., Ltd. offers high-quality LED Neon Flex solutions, including customized options for various needs.
Start your LED Neon Flex project with us and let our expert team guide you through the process, ensuring a bright and colorful outcome!
Q:Is LED Neon Flex Suitable for Outdoor Use?
A:Yes, it's weather-resistant and can be used outdoors. Ensure proper waterproofing and sealing, such as using silicone sealant and heat shrink tubing for added protection.
Q:What Power Supply Do I Need for LED Neon Flex?
A:Depending on the strip's length and type, a 12V or 24V power supply is required. Check the manufacturer's specifications for the right voltage.
Q:Can LED Neon Flex Be Used for Both Residential and Commercial Projects?
A:Yes, neon flex strip light is versatile and perfect for both residential applications like home décor and commercial uses such as signage and lighting displays.