
Views: 0 Author: Site Editor Publish Time: 2025-04-22 Origin: Site
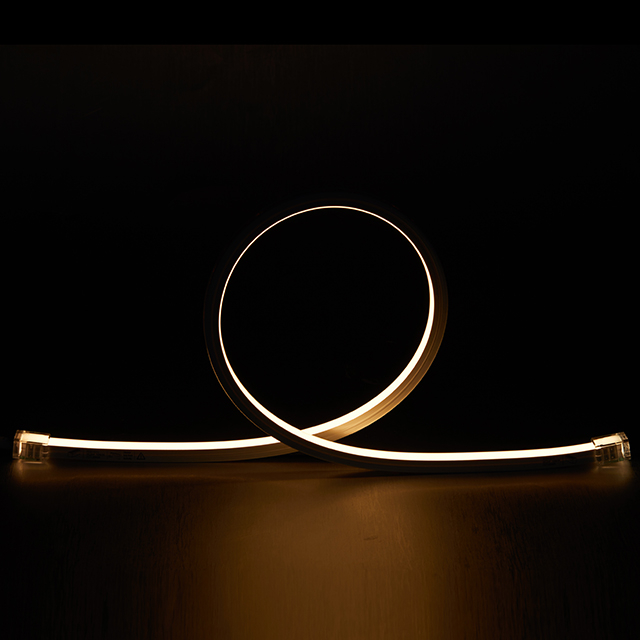
Looking for a way to brighten up your space with vibrant lighting? Neon flex strip lights are a fantastic solution. These flexible LED strips mimic the look of traditional neon signs while offering energy efficiency and customization.
In this guide, we'll show you how to easily and securely install a neon flex strip light on your wall. Learn the best methods to ensure a clean, long-lasting setup without damaging your walls.
Neon flex strip lights are quickly becoming a go-to lighting solution for both home and business spaces. They're not only stylish but also packed with practical benefits. Here's why you should consider them for your next project.
Energy Efficiency:
Neon flex strip lights use significantly less energy than traditional lighting. They provide bright illumination while keeping your electricity bills low. With their efficient LED technology, you get the same vibrant effect with less power consumption.
Durability and Longevity:
These lights are designed to last for years. Neon flex strips are known for their long lifespan and require minimal maintenance. This makes them a cost-effective choice, as you won't need to replace them often.
Customizable:
One of the best things about neon flex strip lights is their flexibility. You can bend, twist, and cut them to fit any design or shape. Whether you want a simple accent or a more elaborate setup, neon flex lights can adapt to your space easily.
Incorporating neon flex strip lights can bring vibrant energy to any room, while being an eco-friendly and lasting solution. Plus, their flexibility gives you endless possibilities for creative lighting designs.
Before you begin installing your neon flex strip light, it's important to prepare. The right tools and materials make all the difference. Here's what you'll need:
Neon Flex Strip Light: Ensure you have enough length for your installation area. Measure twice, cut once!
Power Supply & Connectors: These should match the specifications of your neon flex strip light. Check the voltage and connector type.
Measuring Tape: Use this to measure the area where you'll install the strip. Accurate measurements ensure a perfect fit.
Double-Sided Tape or Mounting Adhesive: Choose a strong adhesive to secure the strip to the wall without falling.
Scissors or Utility Knife: If you need to cut the neon flex strip light, ensure your cuts are clean and straight.
Cleaning Supplies: Use rubbing alcohol or a damp cloth to clean the wall. A clean surface helps the adhesive stick better.
Smooth, Clean Walls: For the best results, ensure your wall is smooth, clean, and dry. This ensures the adhesive sticks properly.
Avoid Rough or Textured Surfaces: These can interfere with the adhesive, causing the neon flex strip light to peel off over time.
First, measure the area where you want to place your neon flex strip light. Use a measuring tape or ruler to ensure precision. Make sure to measure carefully, as even a small mistake could lead to uneven placement. Mark the starting and ending points on the wall for a clear reference.
Most neon flex strips come with clear cutting lines. Cut only along these designated lines. This ensures you don't damage the strip's circuitry. If you cut the strip, you might need to solder new connectors to restore the connection.
Cleaning the surface is key. Use rubbing alcohol or a damp cloth to remove any dirt, dust, or grease from the wall. This step ensures the adhesive on the neon flex strip sticks properly. Without a clean surface, the light strip may not stay in place.
Peel off the backing of the adhesive as you go. Only remove a small section at a time to avoid dust or dirt getting stuck to the adhesive. Once you've exposed the sticky side, position the neon flex strip on the wall, gently pressing it to secure it.
Carefully align the strip along your marks. Press the strip down along its length to ensure the adhesive bonds well. Take your time to avoid air bubbles or crooked lines. Pressing along the entire strip helps avoid any issues with it coming loose.
Once your neon flex strip is securely in place, connect it to the power supply. Turn the lights on to test. Check that the adhesive is holding up and the strip is functioning properly.
Heat the Adhesive: Start by using a hairdryer or heat gun on low heat. Gently apply heat to soften the adhesive. This makes the adhesive easier to remove without damaging your wall.
Use a Plastic Tool: Once the adhesive is softened, use a plastic tool like a spudger or a plastic card to lift the neon flex strip from the wall. Avoid using metal tools, as they may cause scratches or damage to the surface.
After removing the strip, you may notice adhesive residue left behind. To clean it, gently rub the area with a cloth soaked in a gentle solvent or rubbing alcohol. This will help break down the sticky residue without harming the paint or the wall's surface.
Neon flex strip lights offer vibrant, customizable lighting for any space, providing energy-efficient solutions for both homes and businesses. Proper installation ensures long-lasting results without damaging your walls. To secure the strips, clean the surface and use the right adhesives. Explore a variety of neon flex strip light options with Orient Lighting Co., Ltd., a trusted manufacturer of flexible LED strips. Start your installation project today for professional-grade, colorful lighting tailored to your needs.
Answer: If installed and removed properly, neon flex strip lights generally do not damage paint. Use caution when removing the adhesive to avoid peeling.
Answer: Super glue is not recommended, as it can damage the strip and is difficult to remove. Use the provided adhesive backing or specialized mounting options.
Answer: Some neon flex strip lights are rated for outdoor use, but make sure to check for waterproof options if you plan to install them outdoors.